The 7-Second Trick For Drywall Repair Jackson
The Ultimate Guide To Drywall Repair Jackson
Table of ContentsSome Known Factual Statements About Drywall Repair Jackson Drywall Repair Jackson Can Be Fun For Everyone4 Easy Facts About Drywall Repair Jackson ShownThe Best Strategy To Use For Drywall Repair JacksonThe smart Trick of Drywall Repair Jackson That Nobody is Talking AboutSome Of Drywall Repair JacksonUnknown Facts About Drywall Repair JacksonSome Ideas on Drywall Repair Jackson You Need To Know
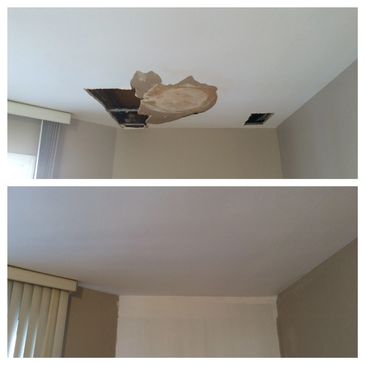
You'll cut another item as well as repeat the process until you ultimately figure out exactly how to put a screw in the center to hold it in place till you can affix the board to the existing wall surface. Next, you will certainly screw a patch to the center of the board. Which has a 50/50 chance of pressing the board into the wall surface, ripping the screws through, and also coming under the tooth cavity.They offer points like Insta-back clips and self-adhesive mesh repair work packages that work rather well. However the repair work kits are extra costly, specifically when you have multiple holes to patch. And also the clips still require to be taped. Making a drywall California patch, on the various other hand, needs no support, no screws, and also no tape.
They are kept in place by leaving the encountering paper bigger than the opening to serve as built-in joint tape. The benefits of making use of a The golden state spot for drywall fixings are that they are cheaper, are completely adjustable to whatever dimensions you require, as well as are quicker than taping. You can also utilize a different thickness of drywall.
Some Known Facts About Drywall Repair Jackson.
Another plus is that the drywall paper is thinner than many joint tape, making it easier to drift out. Simply an opening in the wall.
This is mainly for smaller openings to fix, in the variety of 6"x6". You can press that a bit, however you intend to be mindful to obtain it near to flush. The larger the spot, the less complicated it is to come under or out of the hole. I would usually not suggest going a lot beyond 16" in any direction, yet just if the various other measurement is slim.
It's much simpler to start with something square than to attempt to shape the fixing item to fit. Gauging the width of the opening, about 1" larger all the means around.
About Drywall Repair Jackson
Action 2: Cut a scrap item of drywall concerning 2" bigger in each direction. Measuring for the size of the California patch.
Patch was determined and noted regarding 2" larger and 2" taller than the intermediary. The preliminary patch is currently all set to mark the backside. Step 3: Turn the scrap item upside down and also center it under the opening.
Marking the elevation of the cutout onto the back of the drywall patch. Drywall Repair Jackson. Tip 5: Square up as well as rack up the back side of the drywall.
6 Simple Techniques For Drywall Repair Jackson
Tip 8: Gently roll the snapped item by drawing your fingers in and also pushing your thumbs out and away. It's easiest if you rest the contrary edge on a strong surface. Peeling off the snapped piece from the front paper Step 9: As you roll the piece, it detaches from the front paper starting at the racked up edge and also taking out.
You ought to have a repair service piece with one saggy item of paper hanging off. The very first edge peeled off. Action 10: Repeat actions 6-9 for each side.
Pull from the scored edge to the exterior of the spot. Action 11: You should be left with a drywall plug surrounded by loose paper. You'll need this to lay flat on the wall surface as well as any crumbs will make that impossible.
A Biased View of Drywall Repair Jackson
Right here are a couple of points to take note of: You desire your patch to be as near to flush with the wall as you can (Drywall Repair Jackson). You desire to fill the spaces around the spot, yet not so much that the mud drops right into the dental caries.
Pro Suggestion: You do not intend to exhaust the paper. It will certainly wish to rip sooner instead than later on. Ok, so we have those information exercised. Keep those in mind as we undergo these steps of setup. Step 1: Mix up some hot mud. We like warm mud here because it dries out much faster, does not shrink as a lot, as well as has excellent sticky qualities.
4 Easy Facts About Drywall Repair Jackson Described
We call it back buttering, yet it's more like cream cheese. You can never have way too much cream cheese. Butter the back of the patch. Notification every one of the sides have a lot of excess mud. Tip 4: Position the drywall spot into the hole. The paper must now be resting on the bed of mud.
Tip 8: Gently roll the snapped piece by pulling your fingers in and also pushing your thumbs out and away - Drywall Repair Jackson. It's simplest if you relax the contrary side on a strong surface area. Peeling off the snapped item from the front paper Action 9: As you roll you could try these out the item, it separates from the front paper beginning at the scored side and taking out.
You must have a repair service piece with one drooping piece of paper hanging off. The first edge peeled off. Action 10: Repeat steps 6-9 for each side.
How Drywall Repair Jackson can Save You Time, Stress, and Money.
Draw from the scored edge to the outside of the spot. Step 11: You need to be left with a drywall plug surrounded by loose paper. You'll imp source require this to lay level on the wall and also any type of crumbs will make that impossible.
Here are a couple of points to take note of: You desire your spot to be as near to flush with the wall surface as you can. You desire to fill up the gaps around the patch, however not so much that the mud drops into the tooth cavity.
Maintain those in mind as we go via these actions of installation. Step 1: Mix up some warm mud. We favor warm mud here because it dries quicker, doesn't shrink as much, as well as has wonderful sticky high qualities.
Drywall Repair Jackson Fundamentals Explained
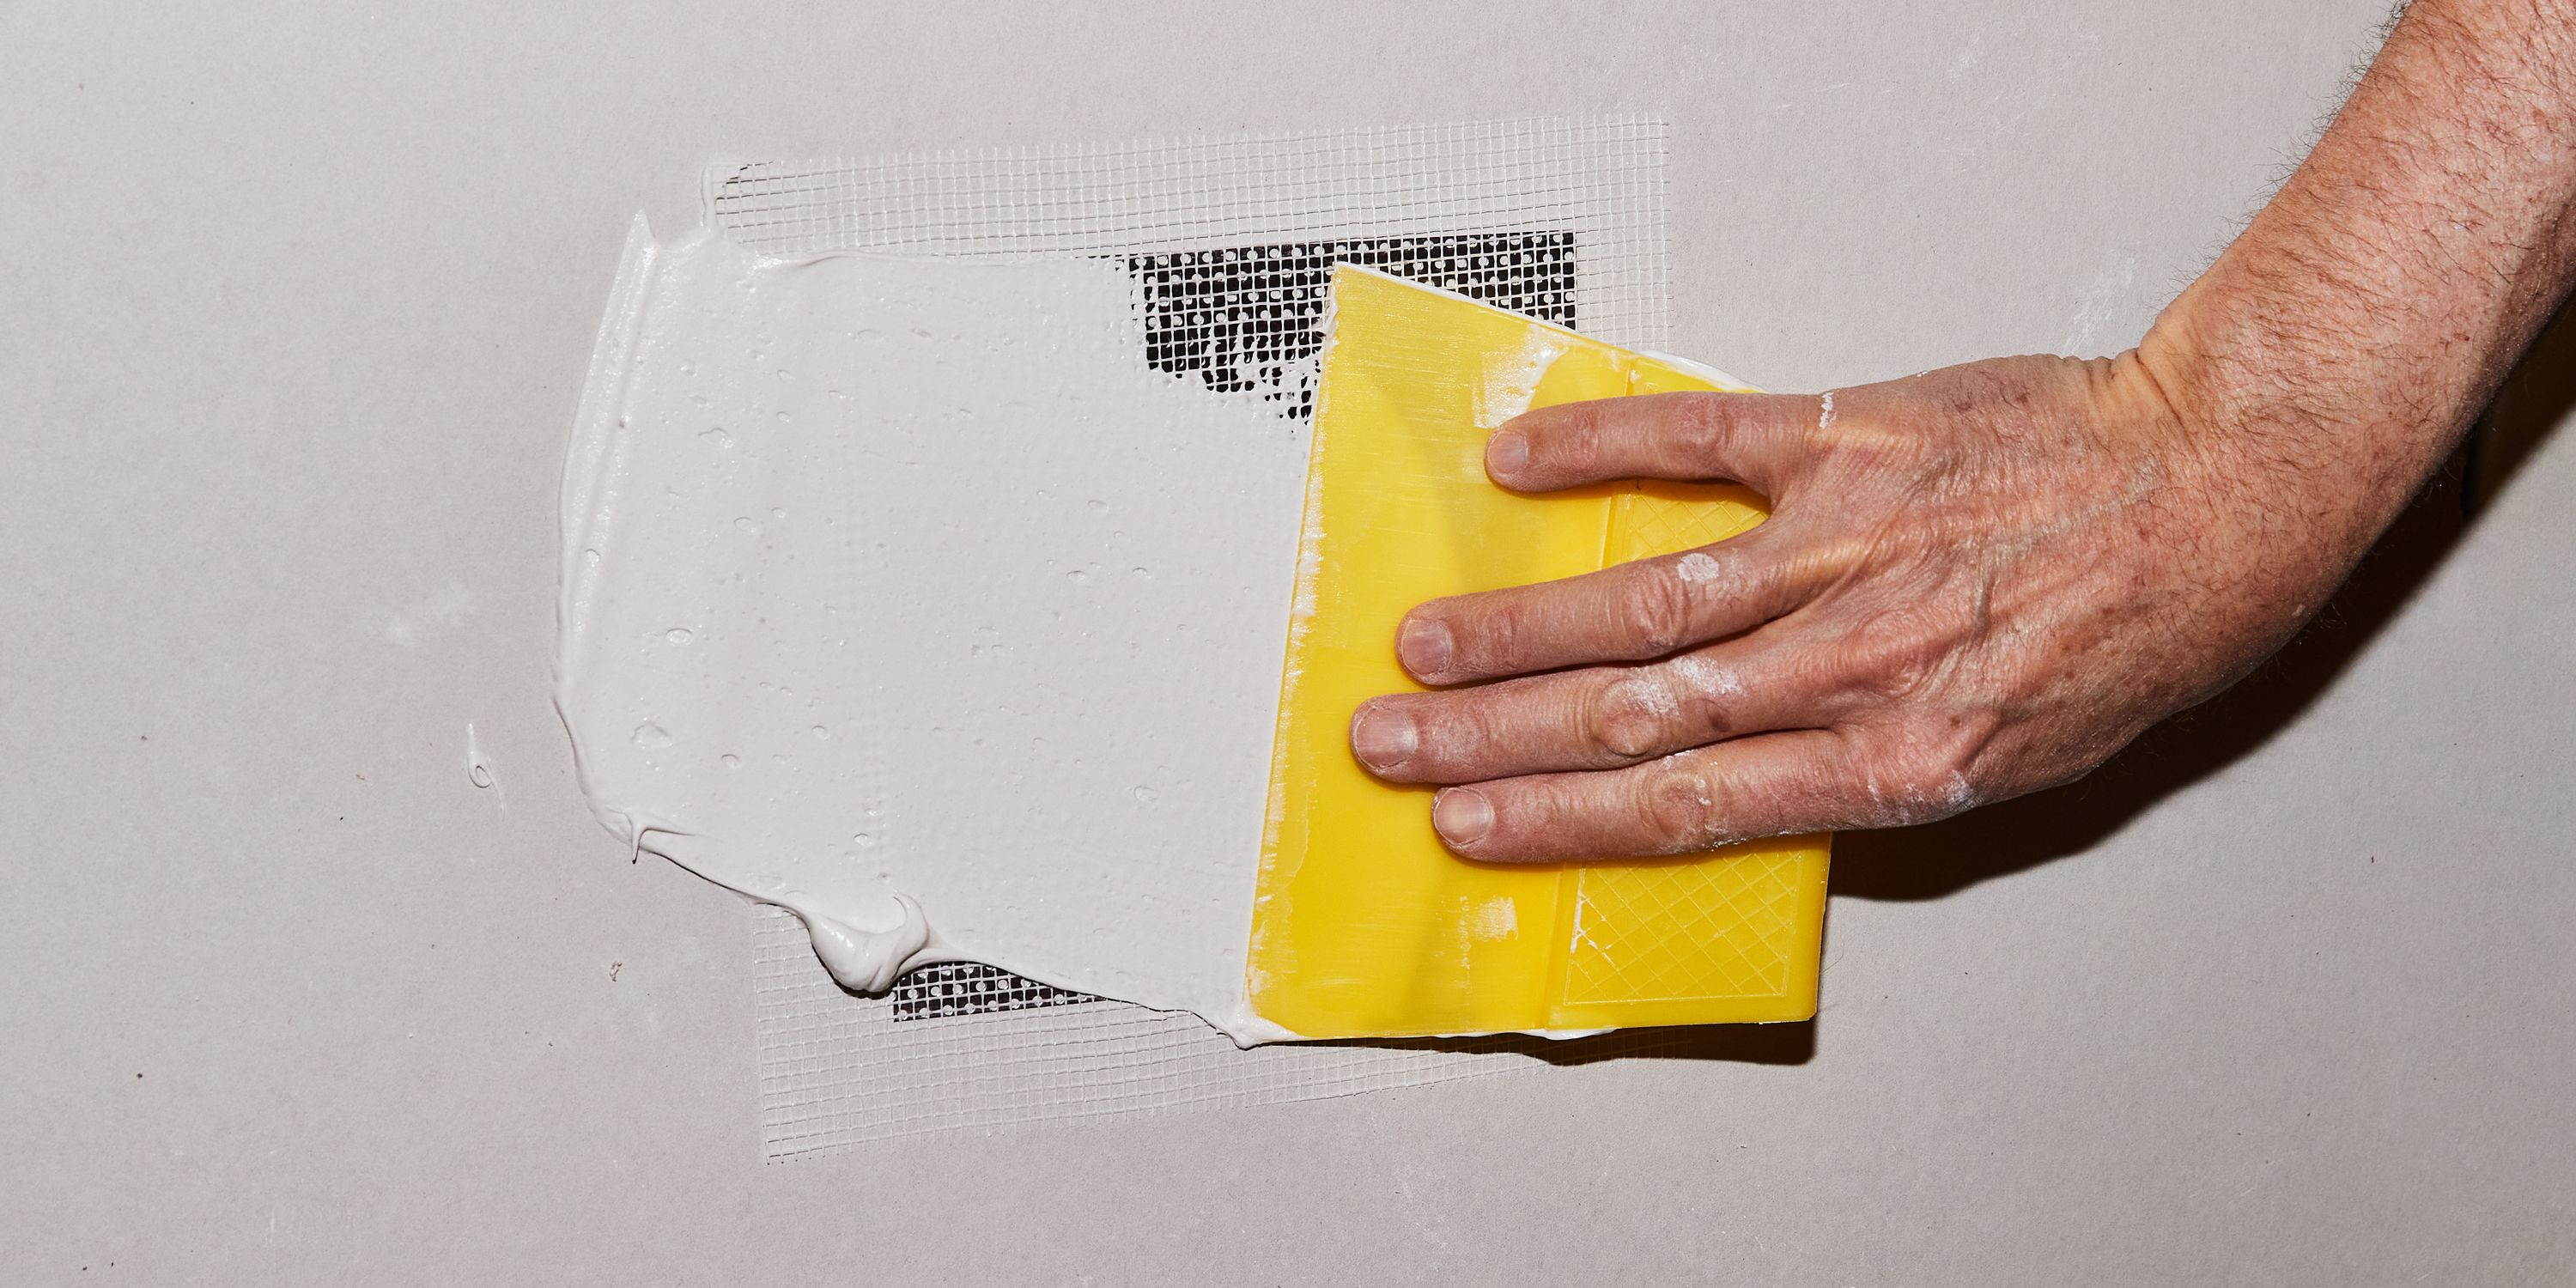
Step 2: Make a mud bed around the hole. Be sure to scratch some around the side to load the voids. Scape mud around the opening and also see to it to get some inside. This will be your glue as well use this link as will shim any type of spaces. Step 3: Currently take some mud and smear it on the behind of the California patch.
We call it back buttering, yet it's even more like lotion cheese. You can never have excessive cream cheese. Butter the rear of the spot. Notification all of the sides have lots of excess mud. Step 4: Put the drywall patch right into the opening. The paper must now be hing on the bed of mud.